Mercuric gilding a cannon barrel.
Thursday, 17th January 2019
By Zane Palmer
Mercuric gilding
Mercuric gilding is a process that has been around for hundreds of year. It involves the dissolving of pure gold or silver in liquid mercury to form an amalgam. The object to be gilded is coated with the amalgam until it is a nice uniform silver colour. Heat is then applied until the mercury has evaporated leaving behind a pure gold coating.
Mercuric gilding is a simple process but is very dangerous to your health as mercury is extremely poisonous so care is needed both when doing the vaporizing of the mercury and when handling the equipment after you complete the gilding process.
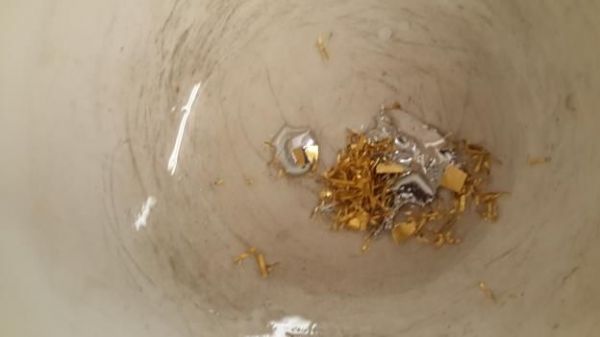
Firstly the gold you use needs to be fine gold and nothing else. The gold needs to be divided into tiny pieces by rolling and cutting or filling with a new clean file. The gold is then placed in a bowl and covered with mercury 1g fine or pure gold to 8 g mercury. You can do this under water if you like as mercury vapor is poisonous. The gold can be ground in a mortar and pestle until it is finely dissolved in the mercury or you can heat the mixture until you see that the volume has started to decrease significantly. Stirring helps during the heating and you may need to replace the missing mercury. Once you feel that the gold pieces are dissolved pure the amalgam into a bucket of cold water. This freezes the gold in a suspended inter metallic crystal phase. If too much mercury has evaporated the amalgam will be hard and can break easily. Add a little more mercury to the mix.
Remember the mercury has turned to steam and will condense again in the air as tiny droplets that are easily breathed in with serious heath repercussions. A chemical mask must be worn or a fume box used. Probably better not to try this at home.
Once the gold and mercury has been heated and allowed to cool it form an almost fudge like silver crystal mass that is a little crunchy to the feel. This is gold amalgam.
Applying gold amalgam to the object to be mercuric gilded is time consuming and has to be done in an area where any amalgam that falls can be recovered. First the object must be cleaned of all grease or finger prints or the gold amalgam will not stick to the base metal. Ultrasonic cleaning in hot soapy water is very effective followed by a short dip in a diluted nitric acid to lightly etch the surface is what I use. Gloves should be worn to protect yourself from getting poisoned by the mercury contacting with the skin and to prevent finger prints being placed on the surface of the base metal once cleaned.
To apply the gold amalgam I use a fine brass wire brush. The brush soon turns into a mess from the vigourous application and scrubbing action that is required. Care must be taken not to leave small crystal of gold amalgam in grooves on the object as these will become blobs of pure gold once the gilding is complete. Also remember that mercury does not like Aluminium so avoid using a brush with aluminium holding the bristles in place.
Mercuric gilding can be poluted by metals with a low melting point such as lead solder and even silver solder. Care should be taken if silver soldered joints are used to ensure that the joint is as neat as possible prior to mercuric gilding. Mercury will form an amalgam with the silver or other low melting point metals while heating and dilute the gold giving a different coloured area on the gilding. This cannot be removed unless you remove the underlying metal to base metal and repeat the mercuric gilding process from the start.
A piece of rolled copper foil that has been covered with Gold amalgam and is now ready for heating with a gas flame or better still over a charcoal fire. This applies an even heat to the whole area. You do not want hot spots to develop when doing mercuric gilding as this can cause a reaction with your base metal and the gold and that leaves the hot spot area with a different colour to the rest of the object.
A Bronze Gribeauval 12 Pounder about the be mercuric gilded.
To apply the mercuric gold amalgam took nearly 3 hours. A mask should be worn during the application as mercury vapor is supposed to be really bad for you. Do this in a well ventilated place even when wearing the correct type of mask.
The support of the object is important. In this case I am using a steel 10mm rod anchored into a wooden board. Remember that the mercury will turn to steam and when it comes into contact with something cooler that its dew point it will again form metallic mercury which remains on that object long after you have finished doing your gilding. The hazard will therefore remain. Google mercuric poisoning to find out what you are in for if you do this wrong.
When applying the heat I use a gas torch and just take my time. Gradually heat the entire barrel until you see it change from silver to gold as if by magic. During this time a ball of cotton wool must be used to smooth down the now liquid gold amalgam and ensure an even finish across the entire surface before the evaporation occurs. A second coating can be applied once it has cooled to ensure a brighter finish. Remember that at this stage there will be no finger print oil on the surface of the gilding so use gloves to handle it.


